Introduction Link to heading
Hello Friends 👋 , hope everyone doing well. In this blog, I am going to share how we can use Packer to secure the underlying GCP Compute Instance
Pre-requisite Link to heading
- Packer If you don’t have one install it by following the official-guide
- GCP account
What is Packer and what problem it solves Link to heading
Packer is the tool that helps to create custom images in an automated fashion. Imagine You want to make sure each instance that you create should have Nginx installed You could go with the following solutions.
- Add the Startup script to the instance so that during the instance creation the startup script will install the necessary stuff
- Custom image where we could create the image baked with all the software and configuration
The first solution is not the efficient way because
- Every time when the instance is getting created we have to wait until the startup scripts finish the installation
- Startup scripts are some times prone to error
So the second solution may seem efficient one
Creation of custom images may be achieved in two ways
- Manually creating the custom Images
- Automating the image creation process
Packer helps to create the custom images in an automated way
Below are the few advantages of the Packer
- Multi Builder option allows building images for multiple cloud providers like Amazon, Google Cloud, azure and even for containers like Docker
- Easily fits into the CI/CD pipelines
- Easy to learn
- Provisioning option which helps to install the necessary stuff
Achieving security using Packer Link to heading
Let’s see how we can achieve security using Packer. Many people tend to think using the cloud makes us secure by default but it’s not true in many cases. Cloud works in the way of shared responsibility, which means there is some level where cloud providers take care of the security where customers have to take care of some security thing
Let’s take the example in Compute Instance Google cloud take care of the underlying infrastructure where users take care of the security at the Operating System level. We have to make sure the software installed in the Instance is updated one and configured in a secured way
Enough of theory lets see in action For the demo I am going to spin up the Simple Compute instance with Ubuntu as the base Image with Docker Installed
Now I am running Docker-CIS-benchmark script on the instance that we have created
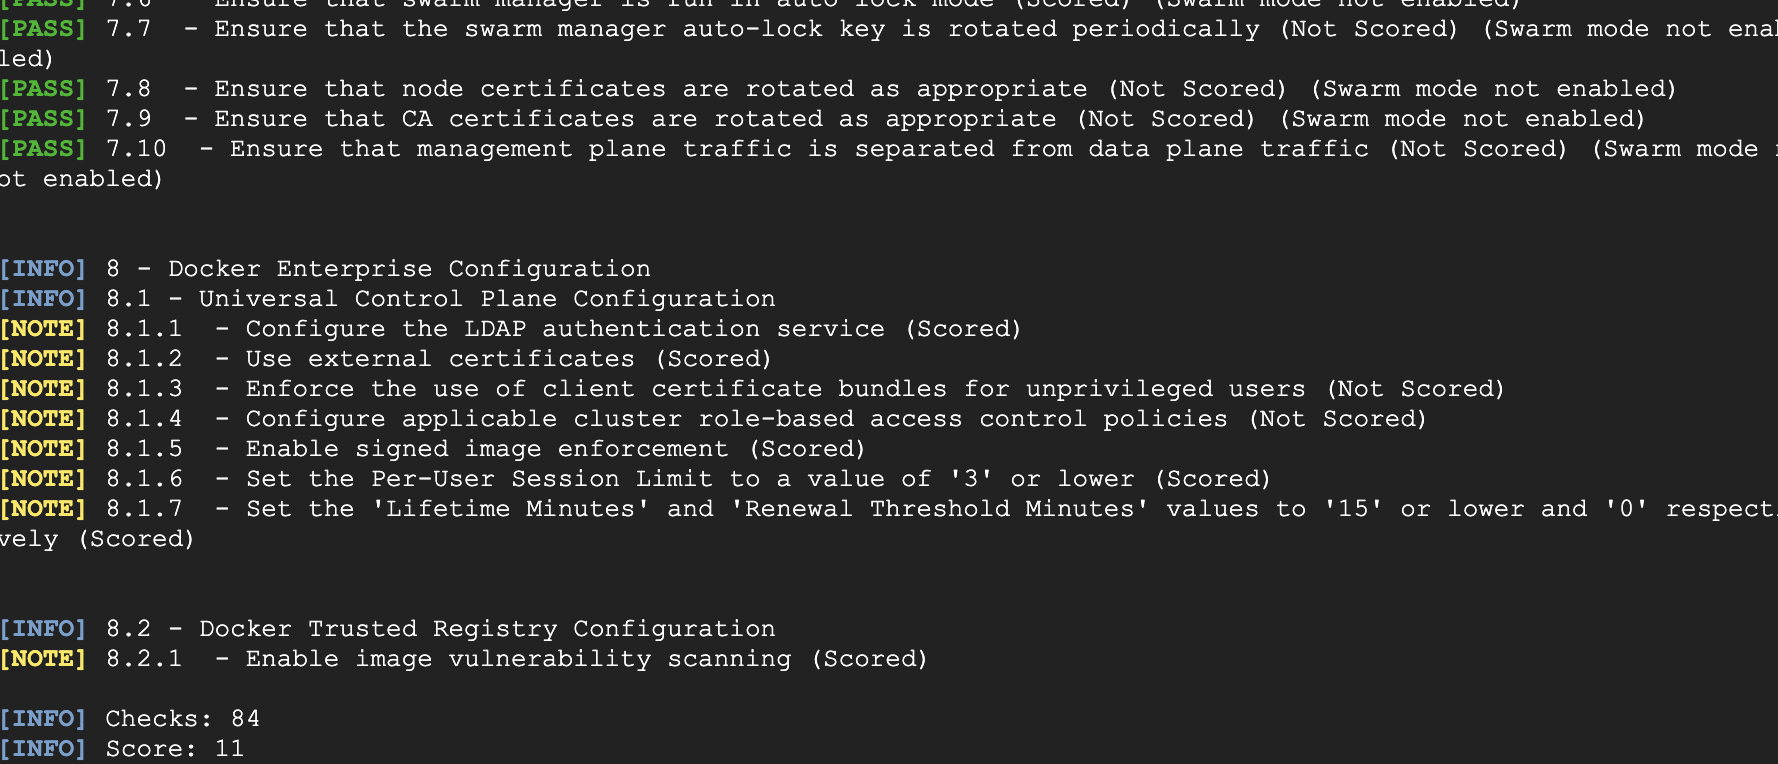
You could see the script able to find many security flaws and currently, we are getting Score-11 to let’s see how we can improve it
Creating Hardened Image using Packer Link to heading
Creating Hardened Image is the two step process
- Create the Service Account
- Build the Image
First, we have to create the Service account with the necessary permission to create the custom Image
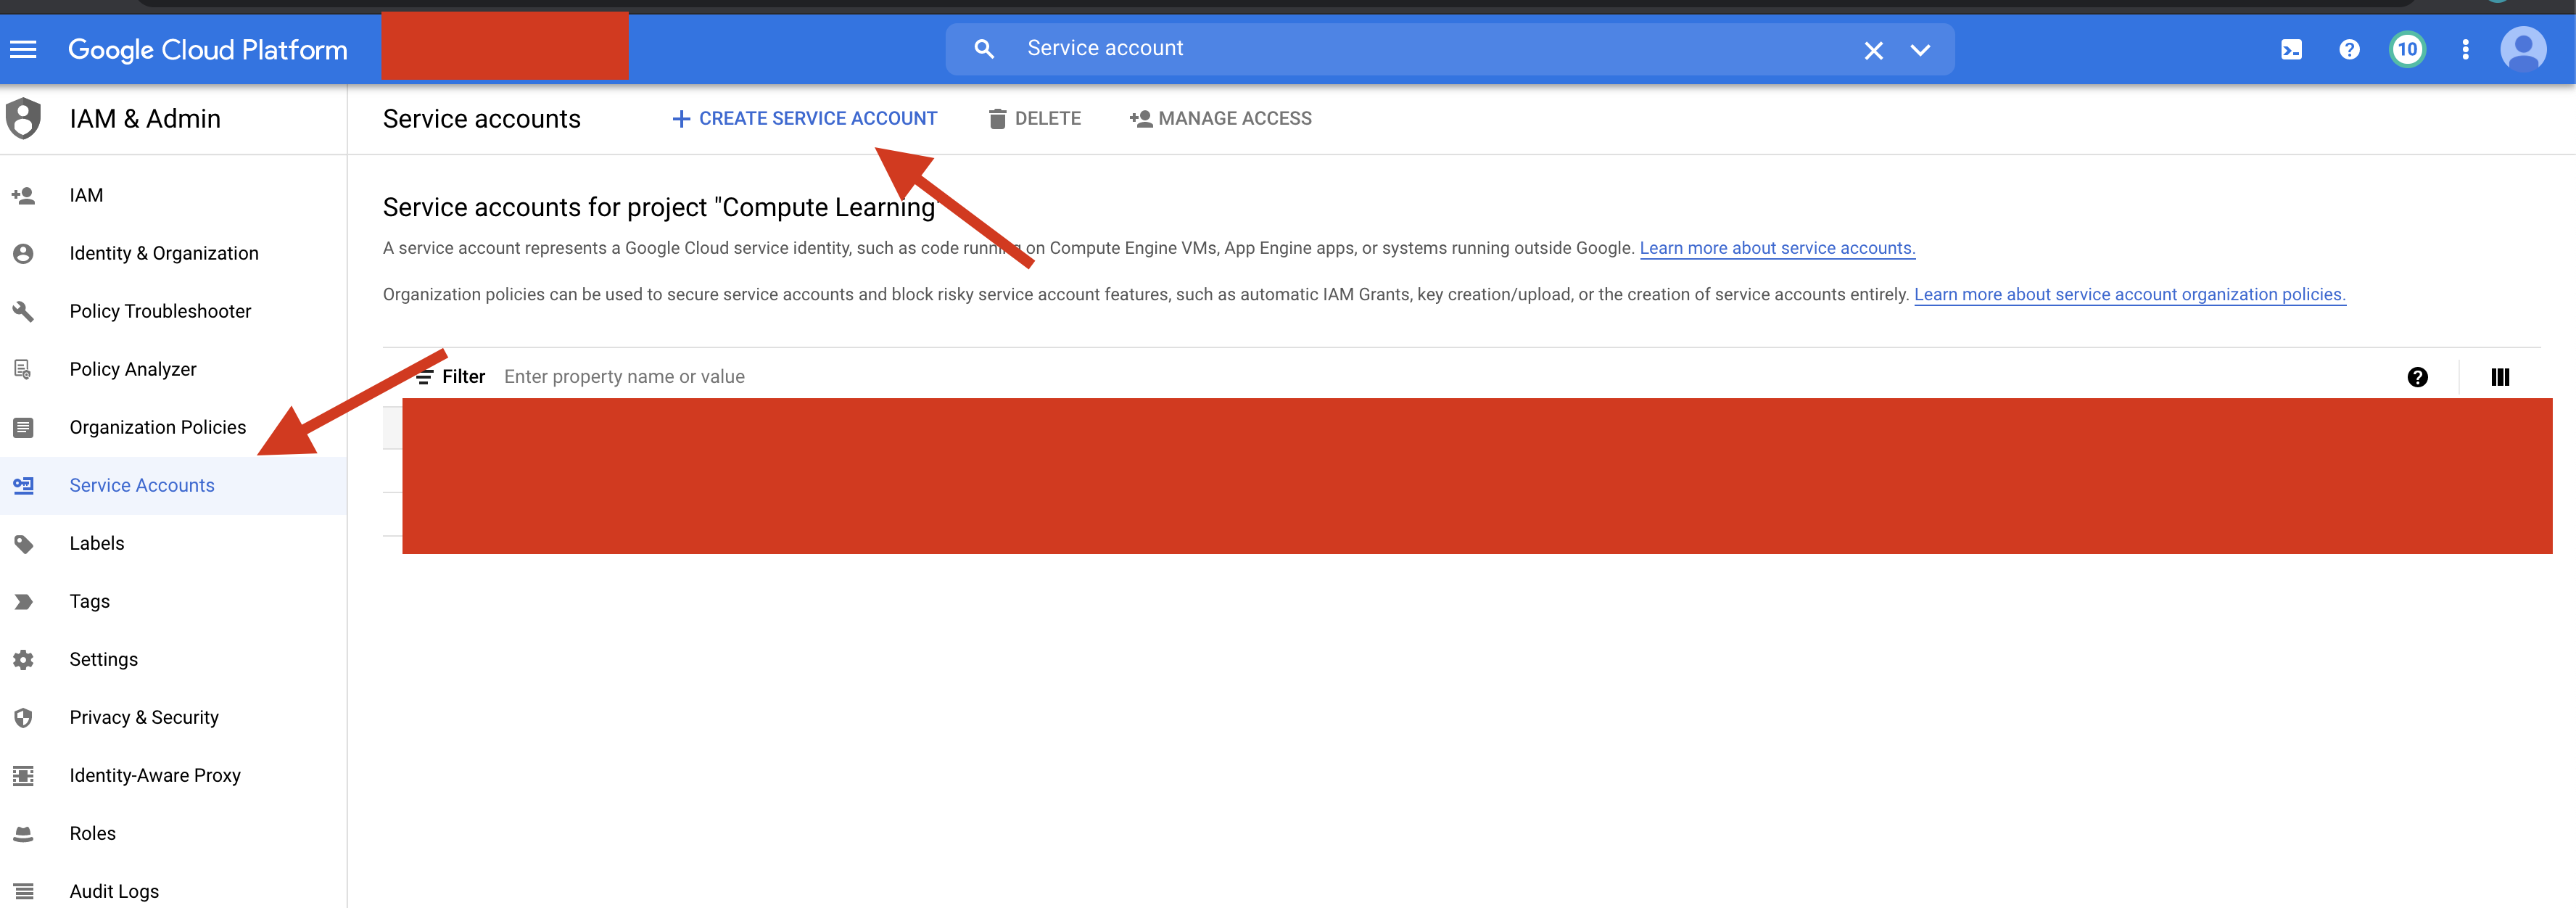
Go to the Service account under IAM and Click CREATE SERVICE ACCOUNT option
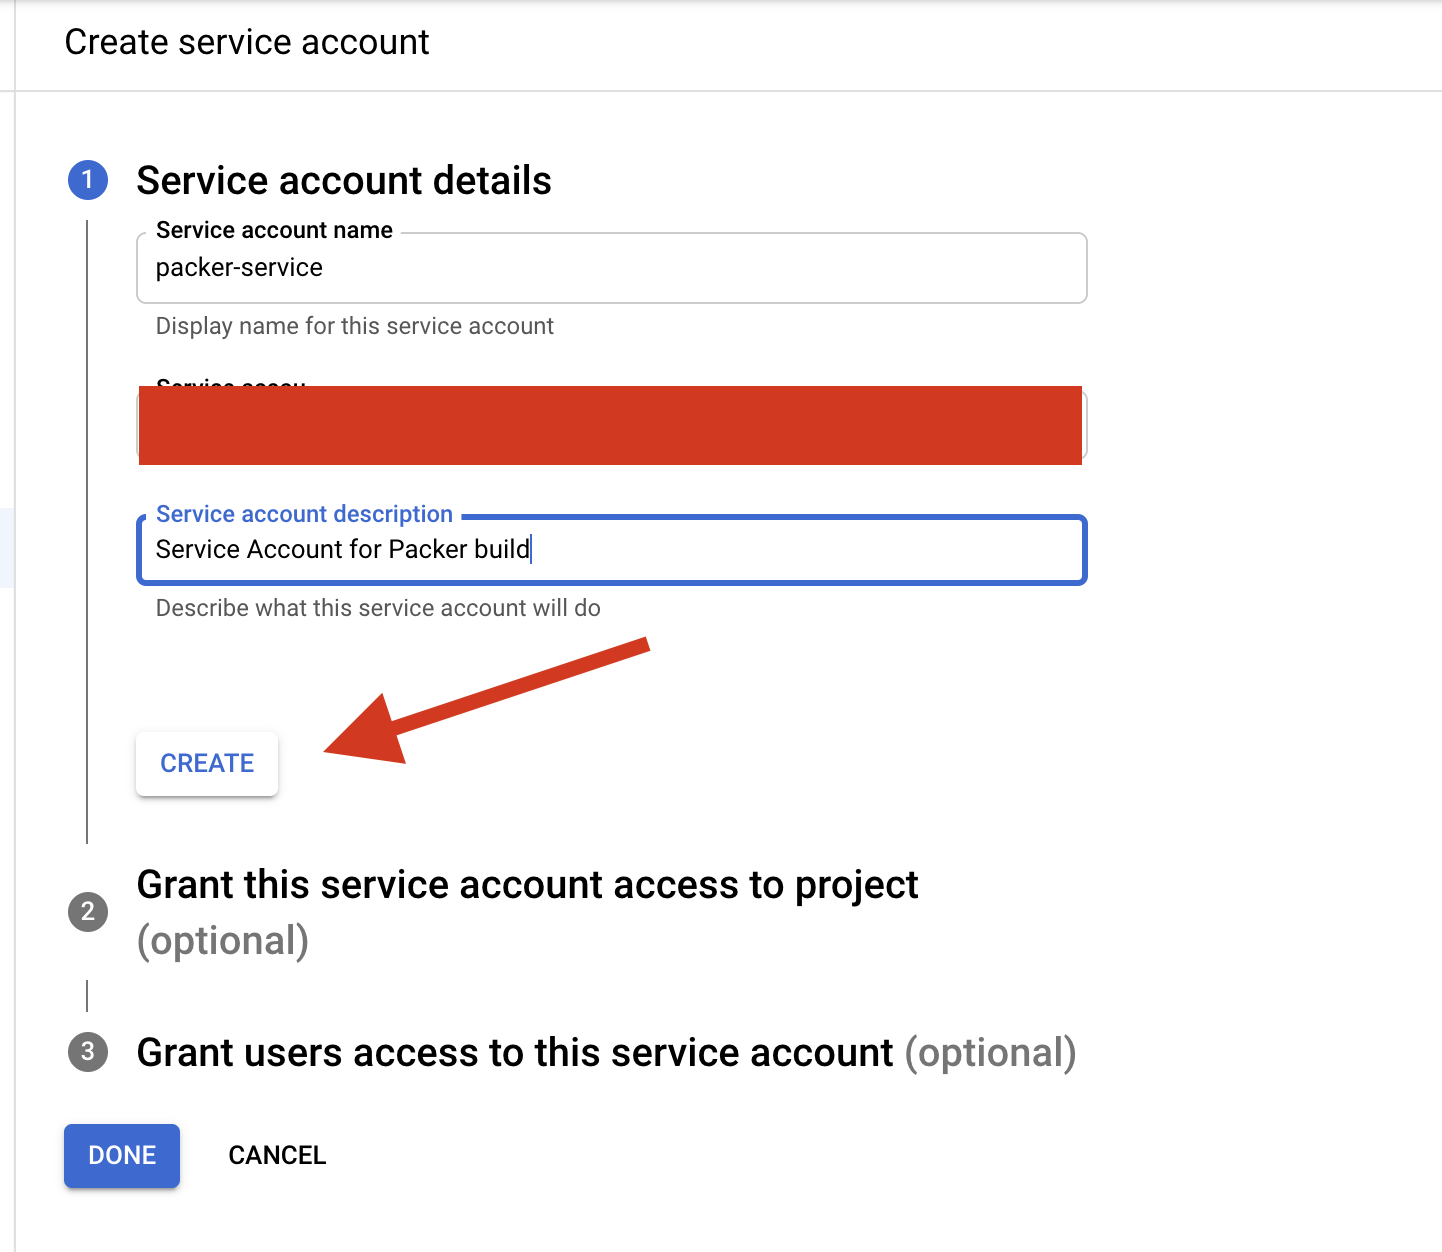
 Enter the Service account name and the description and Click create
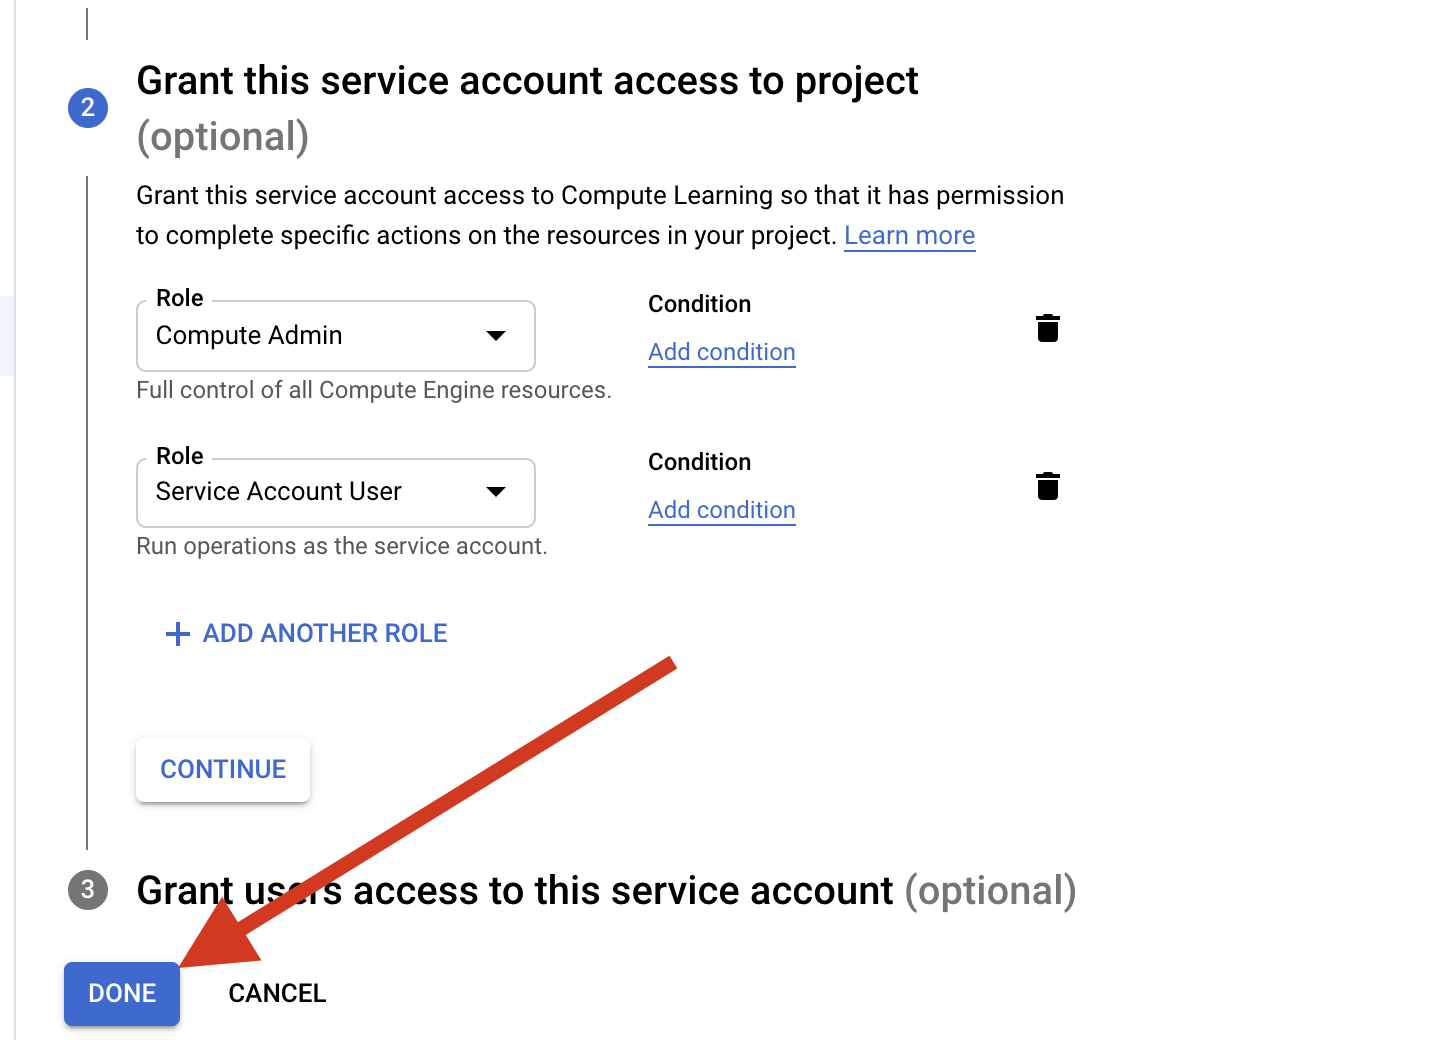
Add the Compute-admin and Service-Account-user Role to the Service account and click Done
Click the created Service-account name on the Service account Page Select the Keys and click ADD KEY and click create a new key
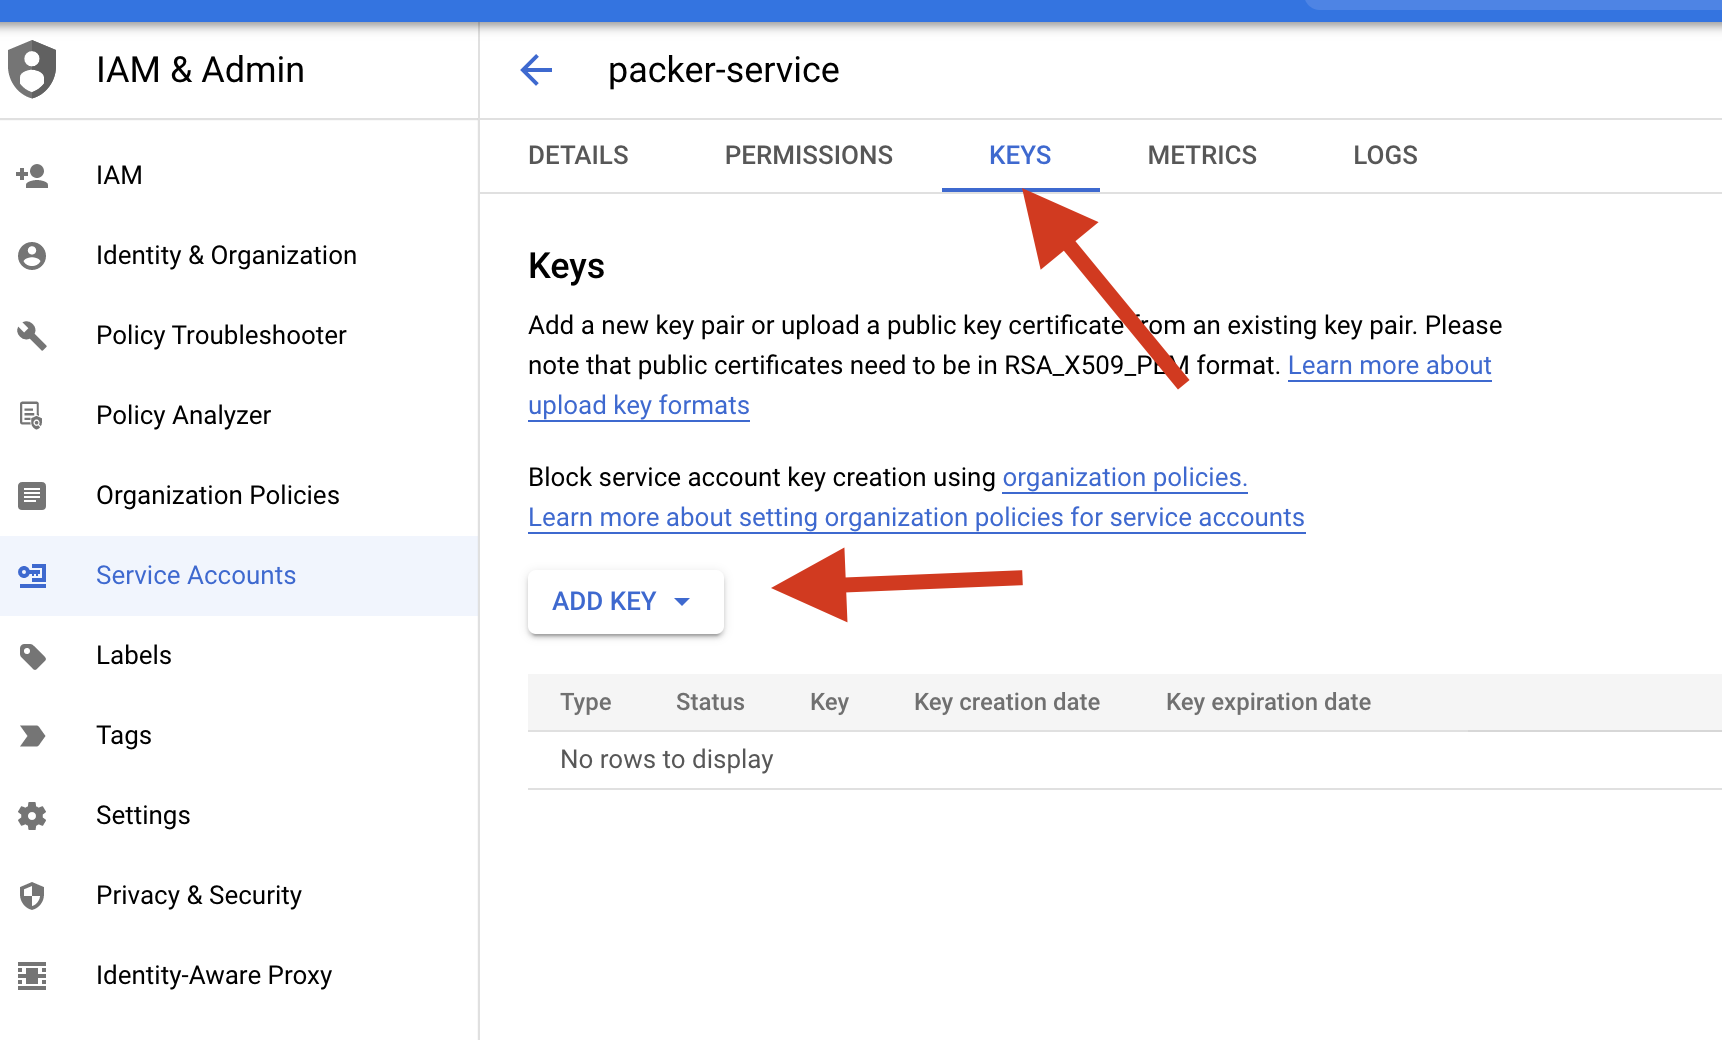
Select the JSON option and click create
Note: Make sure to store the downloaded key somewhere safe if the key gets compromised the attacker can access the resources in the GCP
Build the custom Image Link to heading
Clone the repo using the below command
$ git clone https://github.com/JOSHUAJEBARAJ/packer-demo.git
Now move into the cloned folder
cd packer-demo
The folder has three files
| Files | Description |
|---|---|
| build.json | file containing the detail about the image |
| docker.sh | bash Script to install the Docker |
| harden.sh | bash Script to harden the docker installation |
Replace the below content of the build.json file
| Field name | Value |
|---|---|
| Image name | The image name of the resultant Image(It should be unique) |
| account file | Name of the Service account file |
| Project_id | Replace the Project ID with your Project ID |
Now type the below command in the terminal to validate the packer configuration file
$ packer validate build.json
Now build the image using the below command
$ packer build build.json
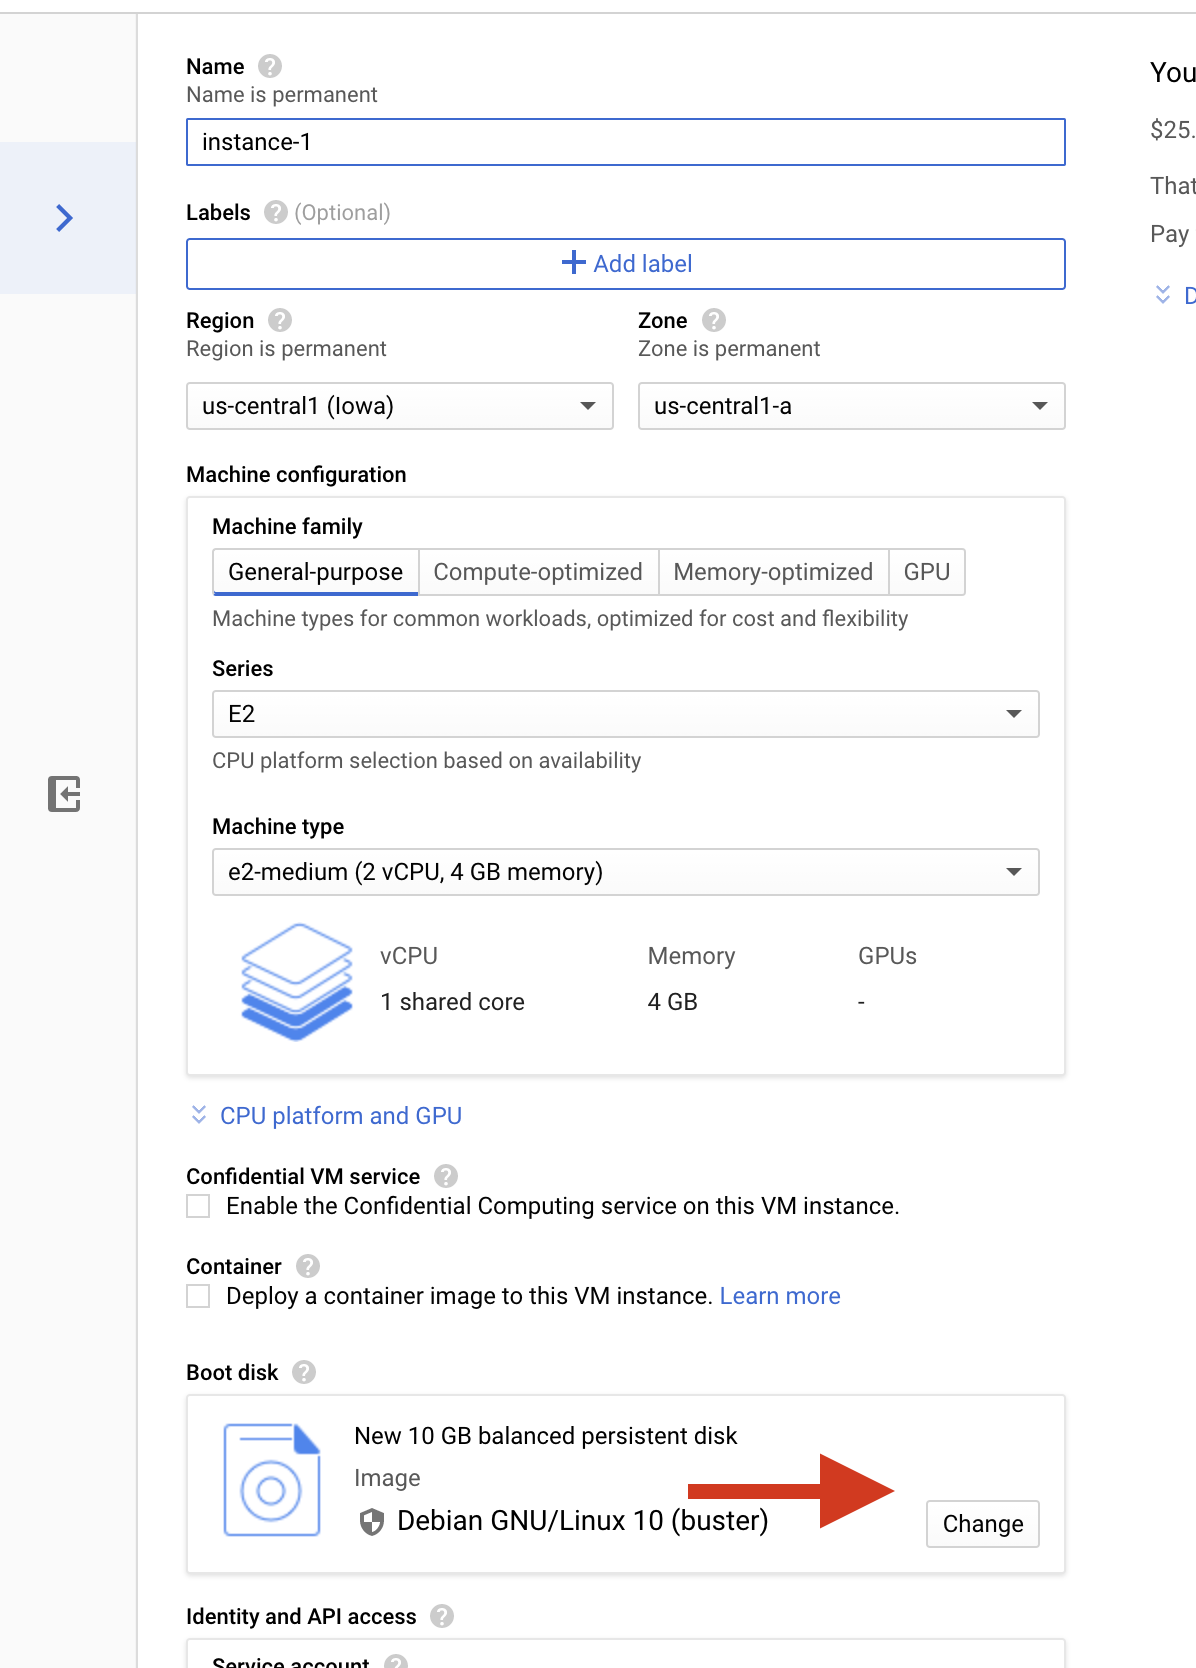
Now create the instance using the custom image that we created above During creation of the instance change the boot disk of the disk by clicking change

Now under custom image select harden-image and click select

Now I am again running the Benchmark script on the instance with the customized base Image you could we bumped the score from 11 to 19
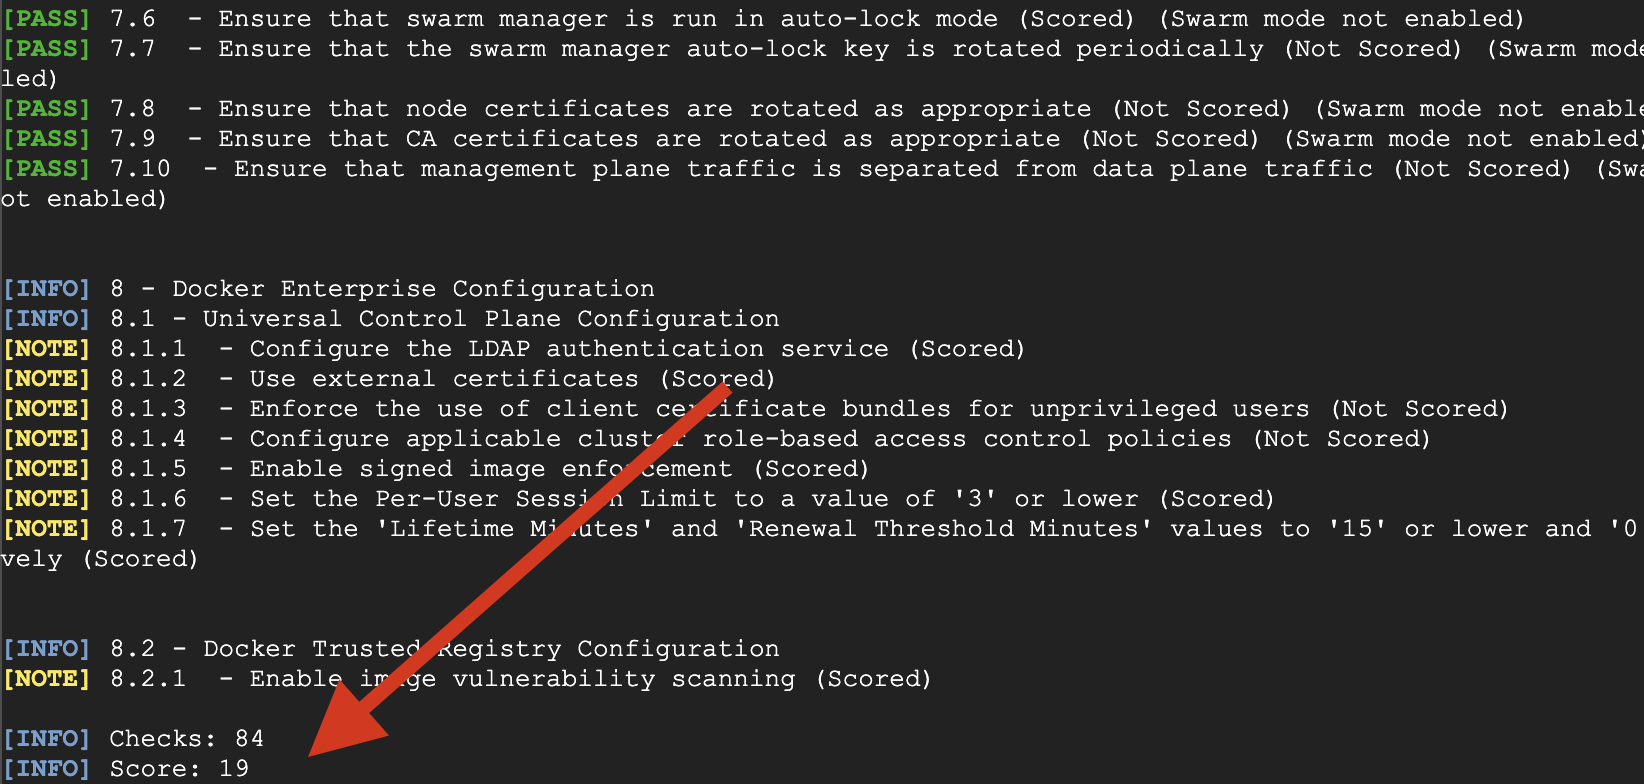
This is the simple example that I have shown in the blog you can leverage the provisioner like ansible to create the more secure and custom image of your choice for various builders
Conclusion Link to heading
Thank you for reading my blog I hope you learned something ,If you have any comments or questions feel free to reach out to me on Twitter Feel free to check out my other articles at my-website