Introduction Link to heading
Hello Friends 👋 ,hope everyone doing good .In this blog I am going to share how we can get started with the GCP
Outcomes Link to heading
By the end of the article you will be able to create the project and setting up the billing alerts in the Google Cloud
Pre-requisite Link to heading
- Valid Gmail ID
- Valid credit card (Don’t worry you wont be charged)
Creating the Google Cloud Account Link to heading
Go to the Google-cloud page and create the google cloud account if you don’t have google cloud account already, On signing up you will get 300 USD as the sign up bonus for one year which will be more than enough for learning and Google also gives some of the resources free forever you can read more about that here
Creating the Project Link to heading
Every GCP resource can be created only within the project. To create the new project click the drop down menu in the left corner

Click in the NEW PROJECT option ,enter the name of the project and click **Ok **
Note we do have certain limitation on number of projects that we can create under the free tier Keep this in mind while creating the project

Setting up the billing alerts Link to heading
While learning the GCP we want to make sure that we don’t accidentally ended up using more resources than the free tire ,In order to prevent the accidental cost we can setup the billing alert ,this will be also useful when we work in the organization
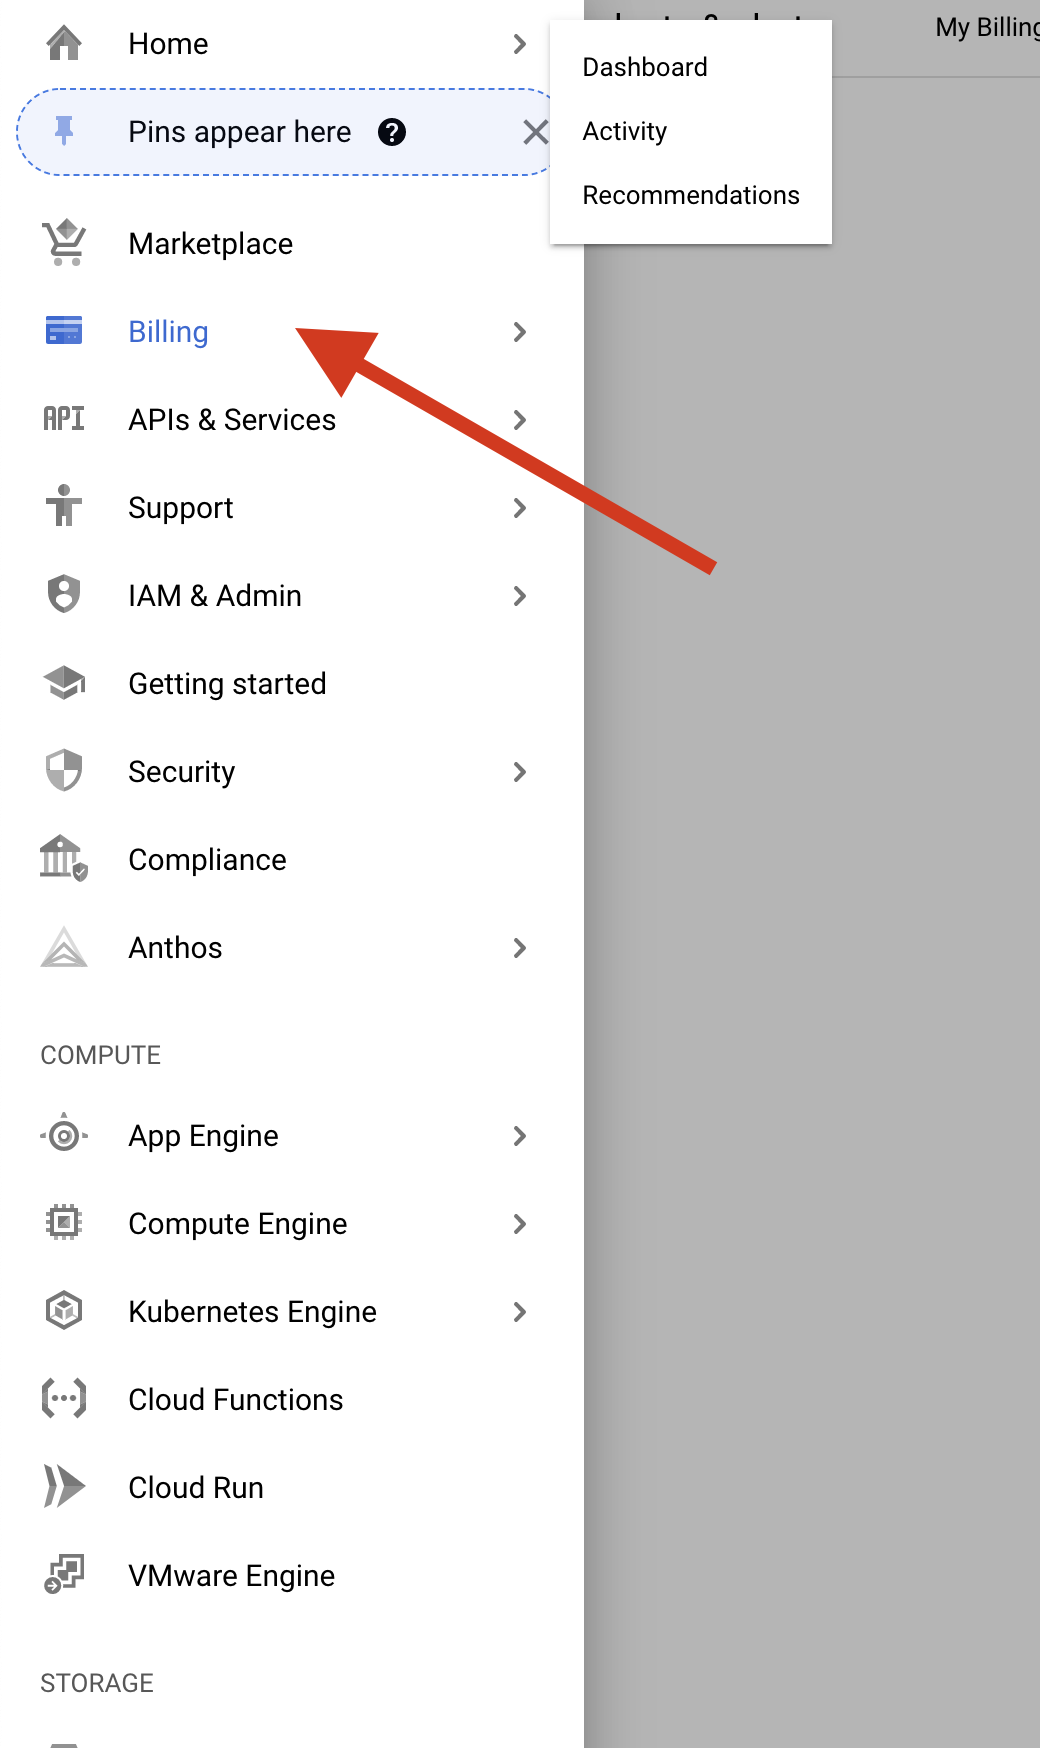
Click the Billing Option in the left corner and select the default billing account
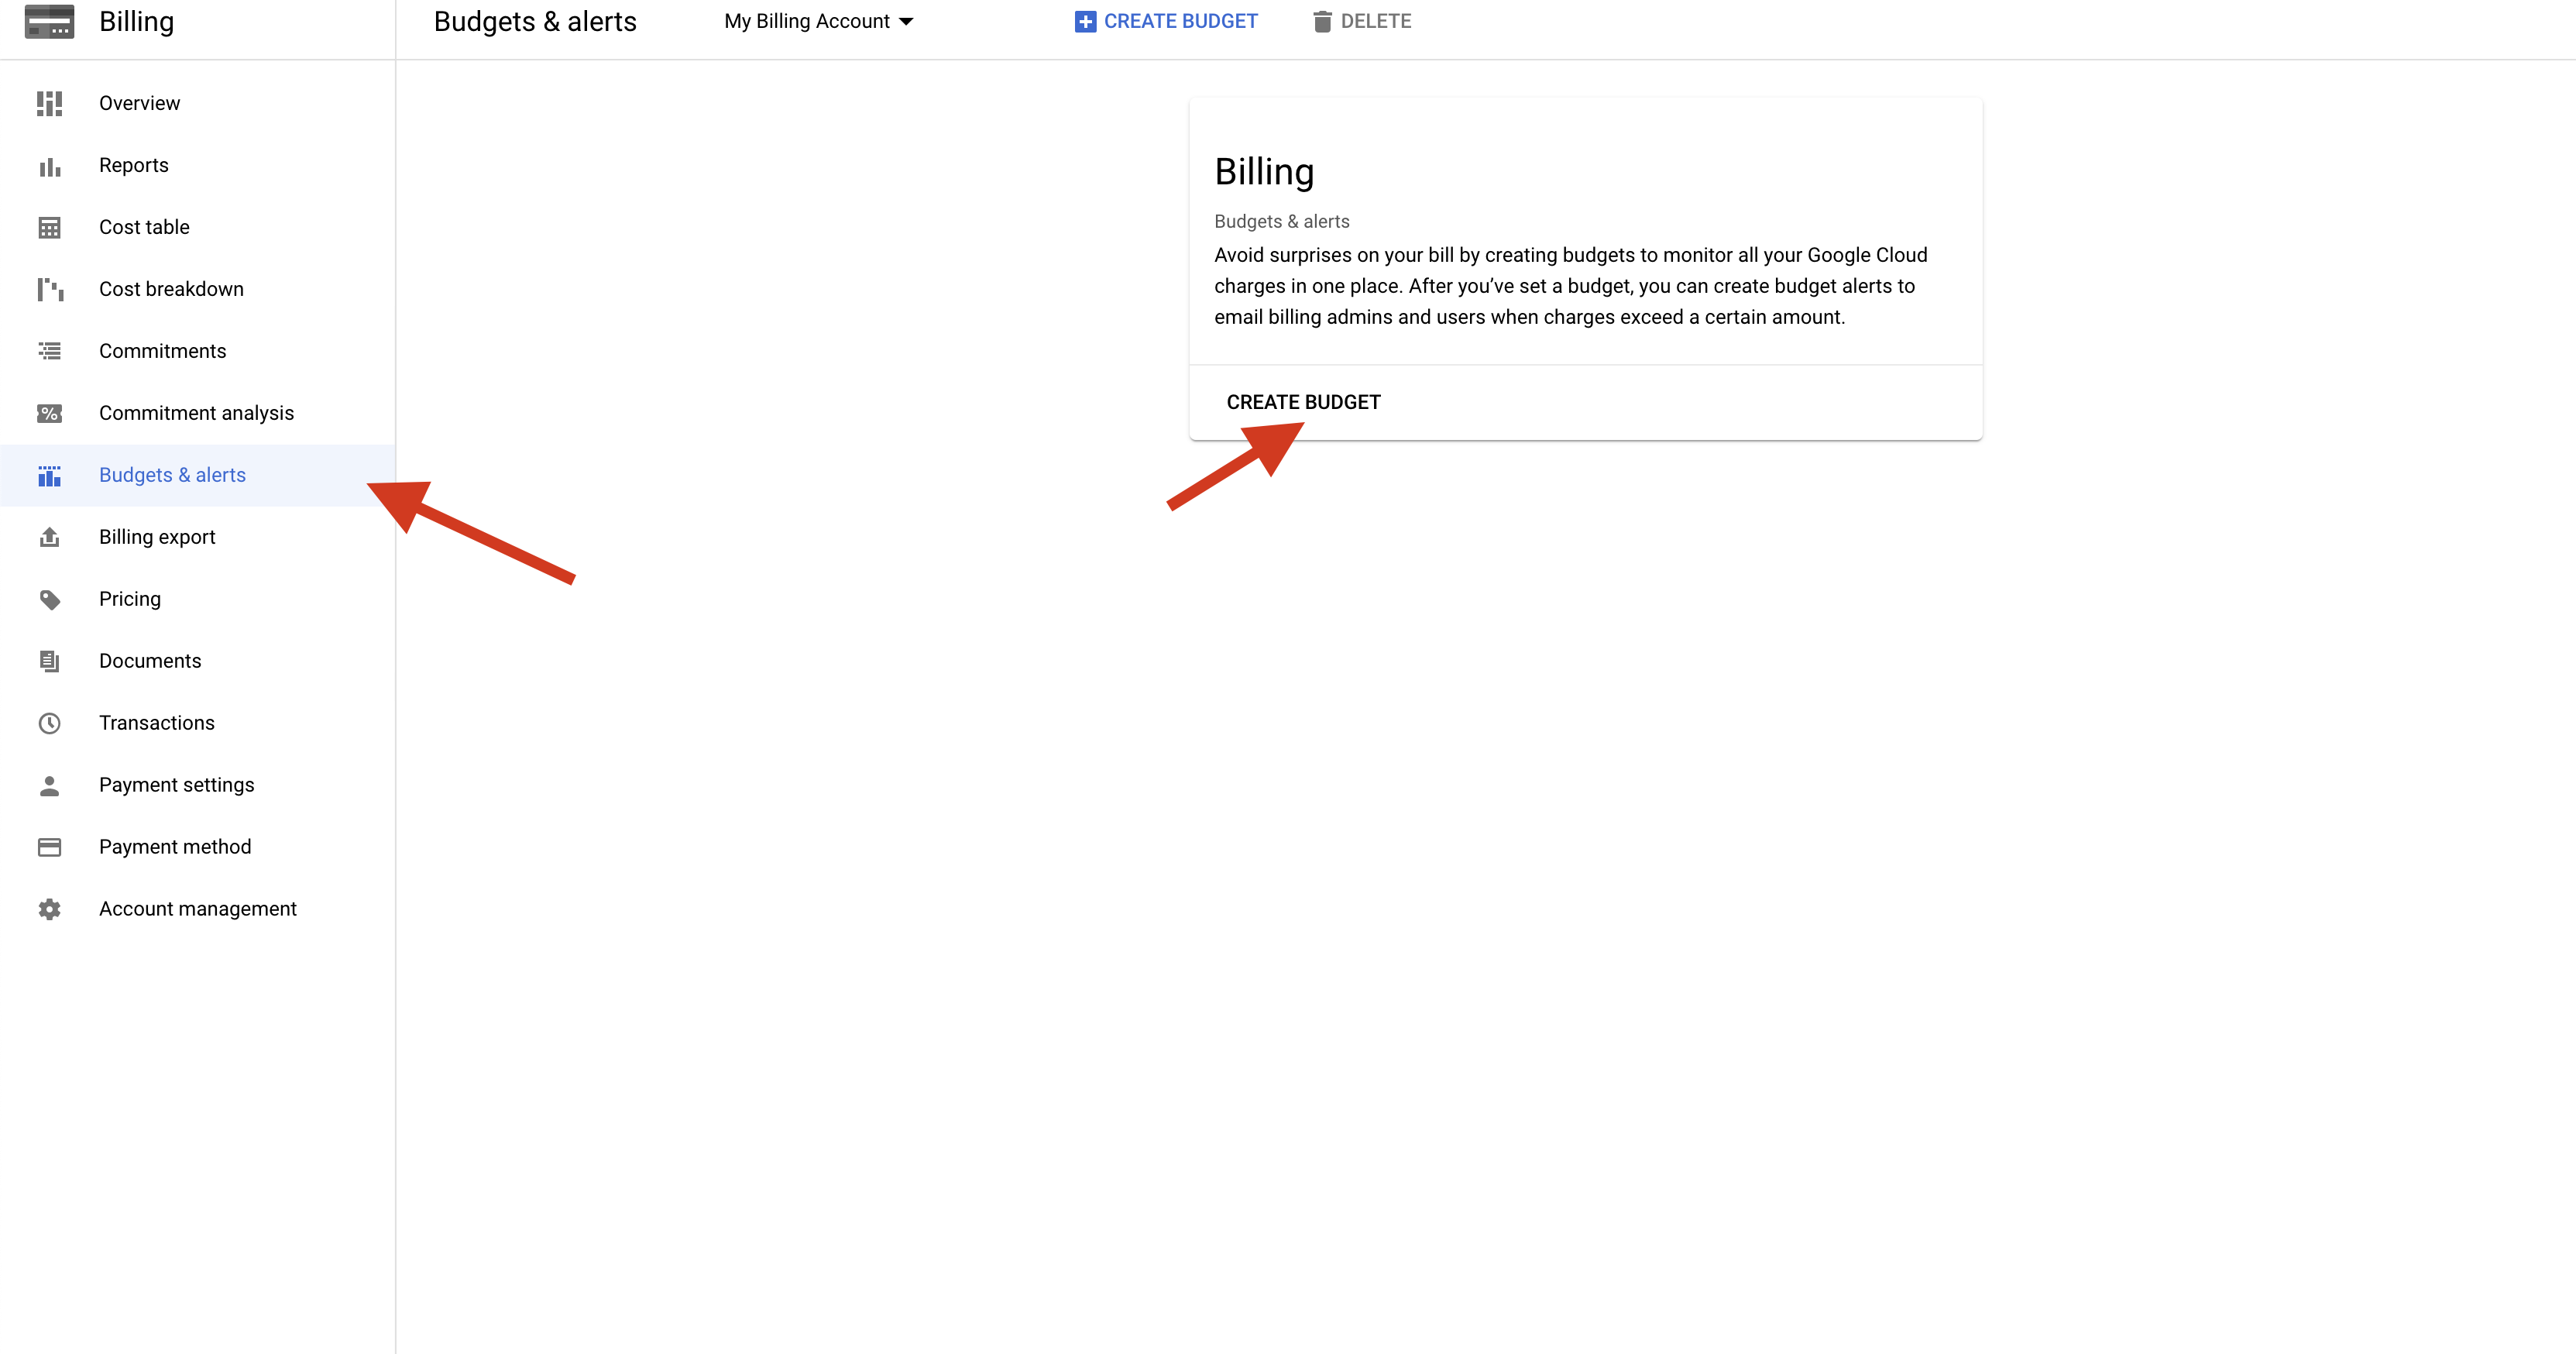
Click the Budget & alerts option and click create Budget
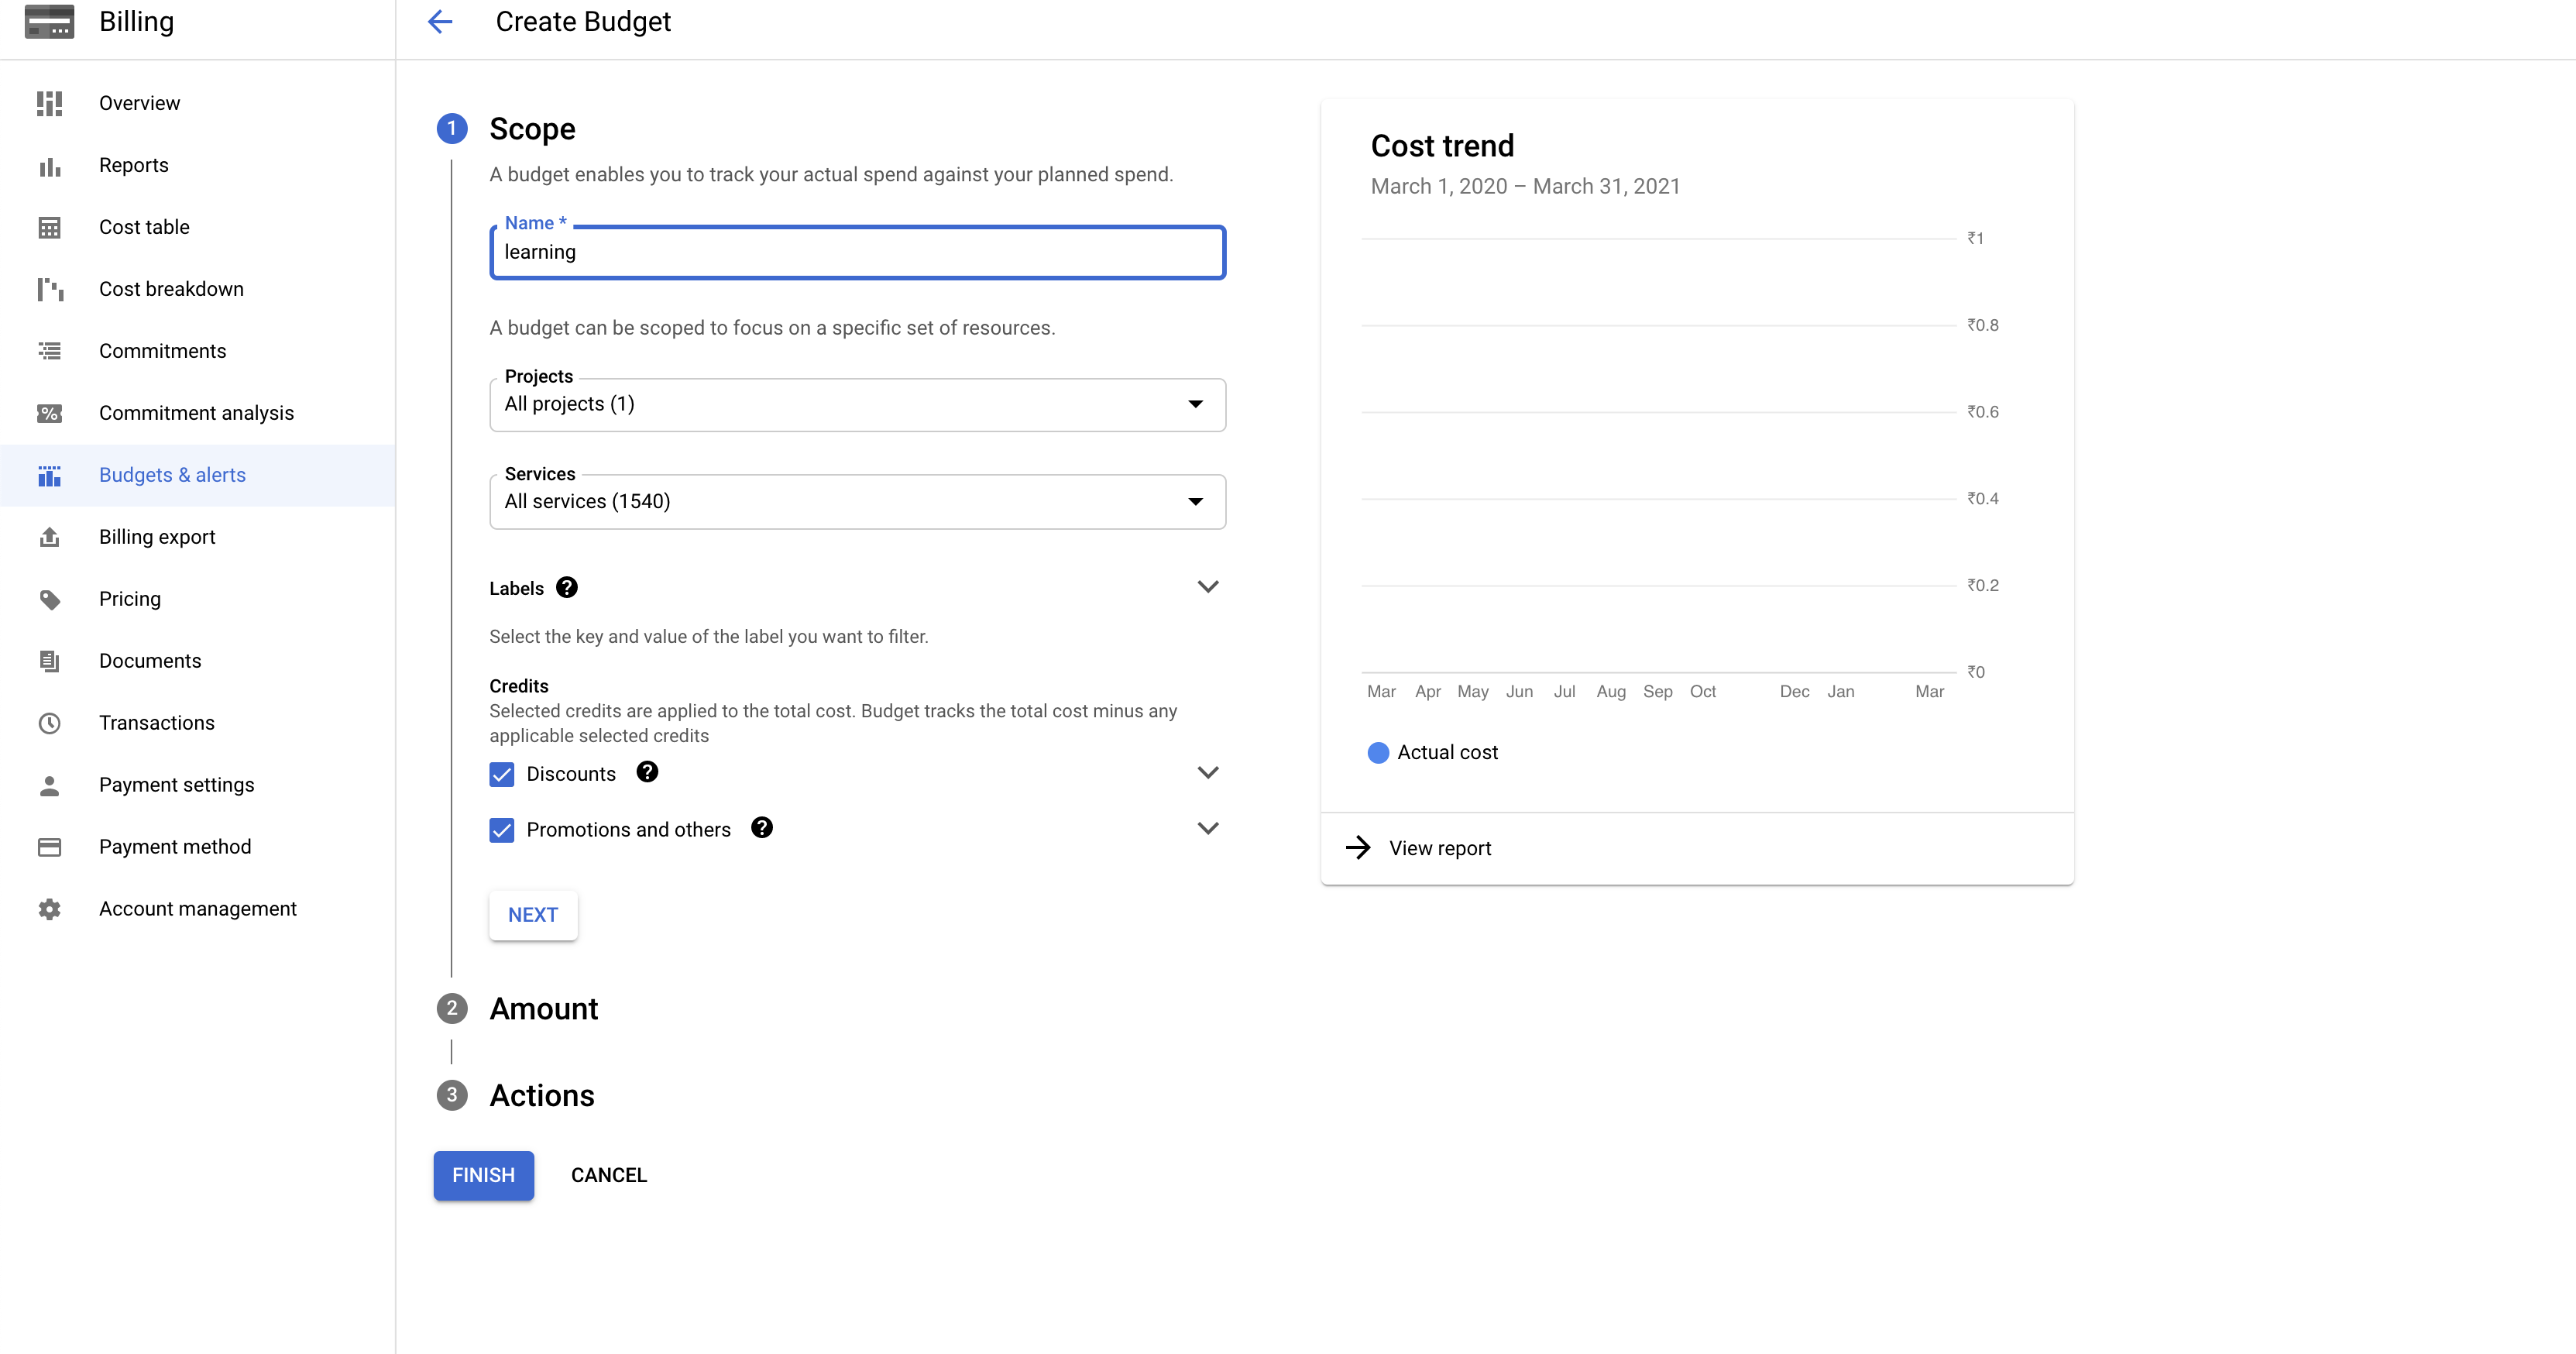
On the Next page enter the Name of the alerts we have to also set the following options
Projects - We can select either all projects or a particular project
Services - We can select either all services or particular services like compute , bucket
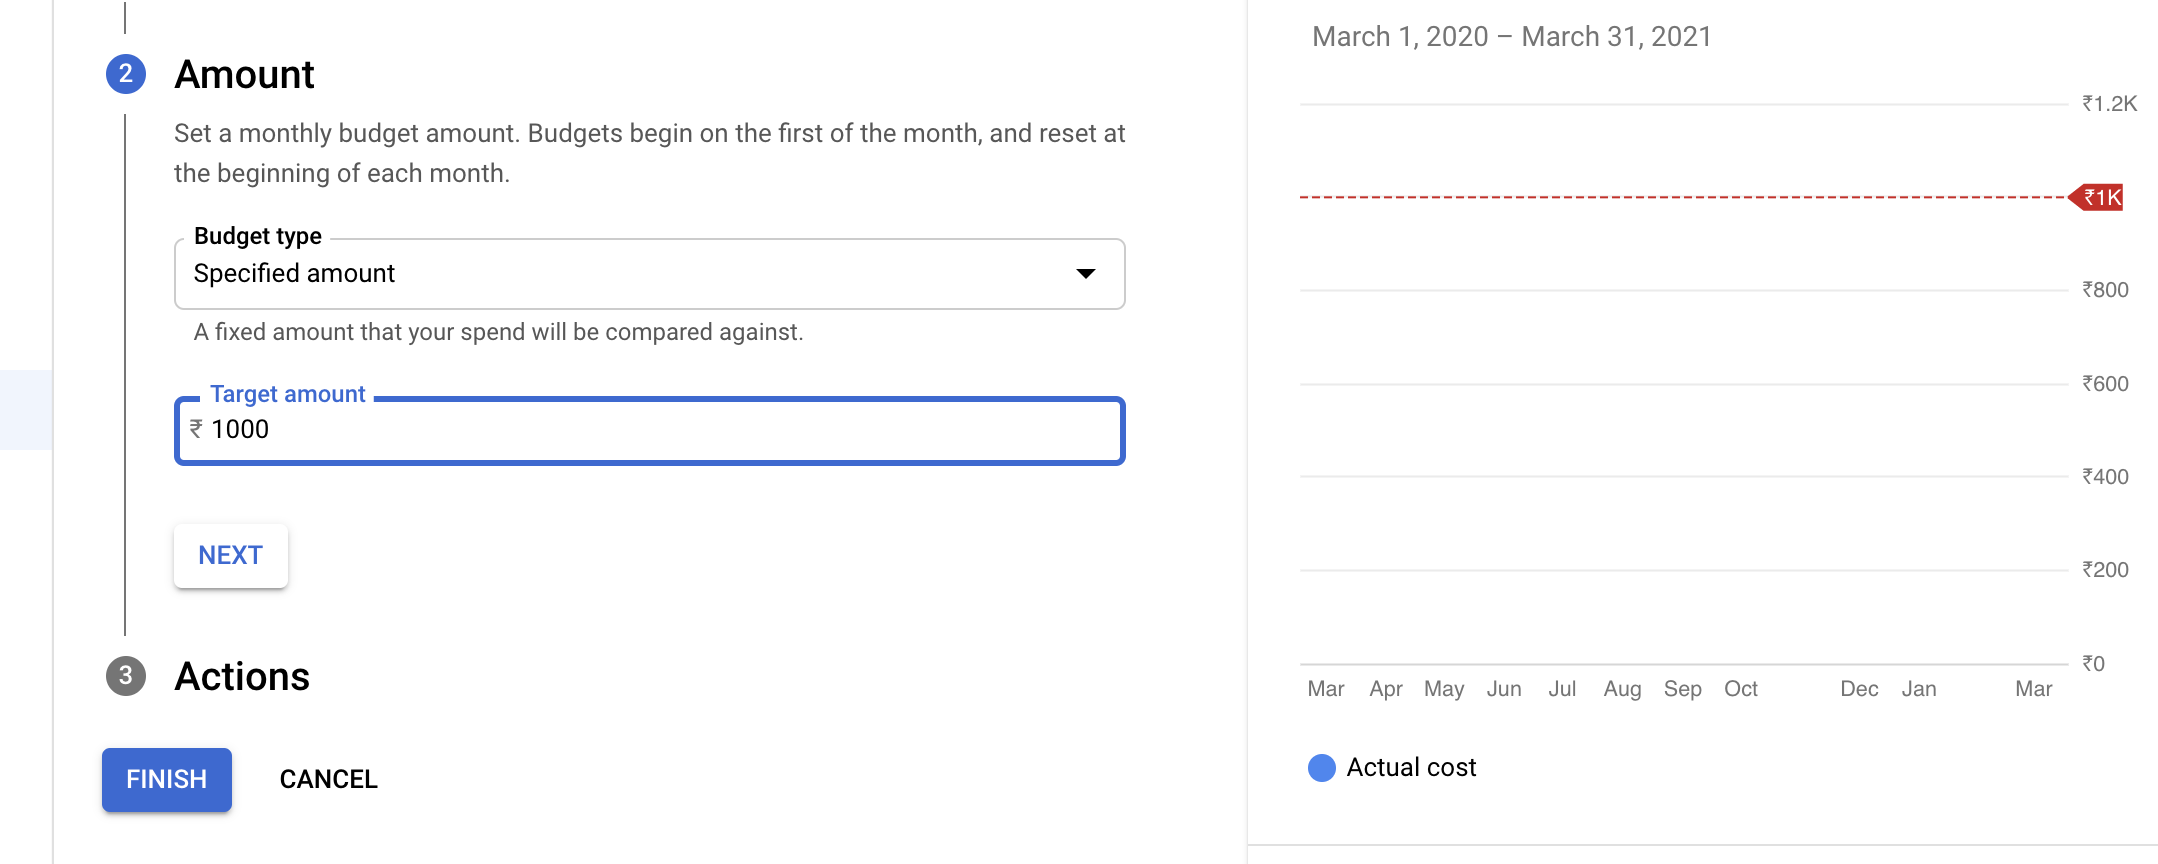
On the next page we will enter the amount for our example I have entered 1000rs
On the Next Page enter the threshold limits GCP by default creates 3 threshold limit we can either add or remove the threshold
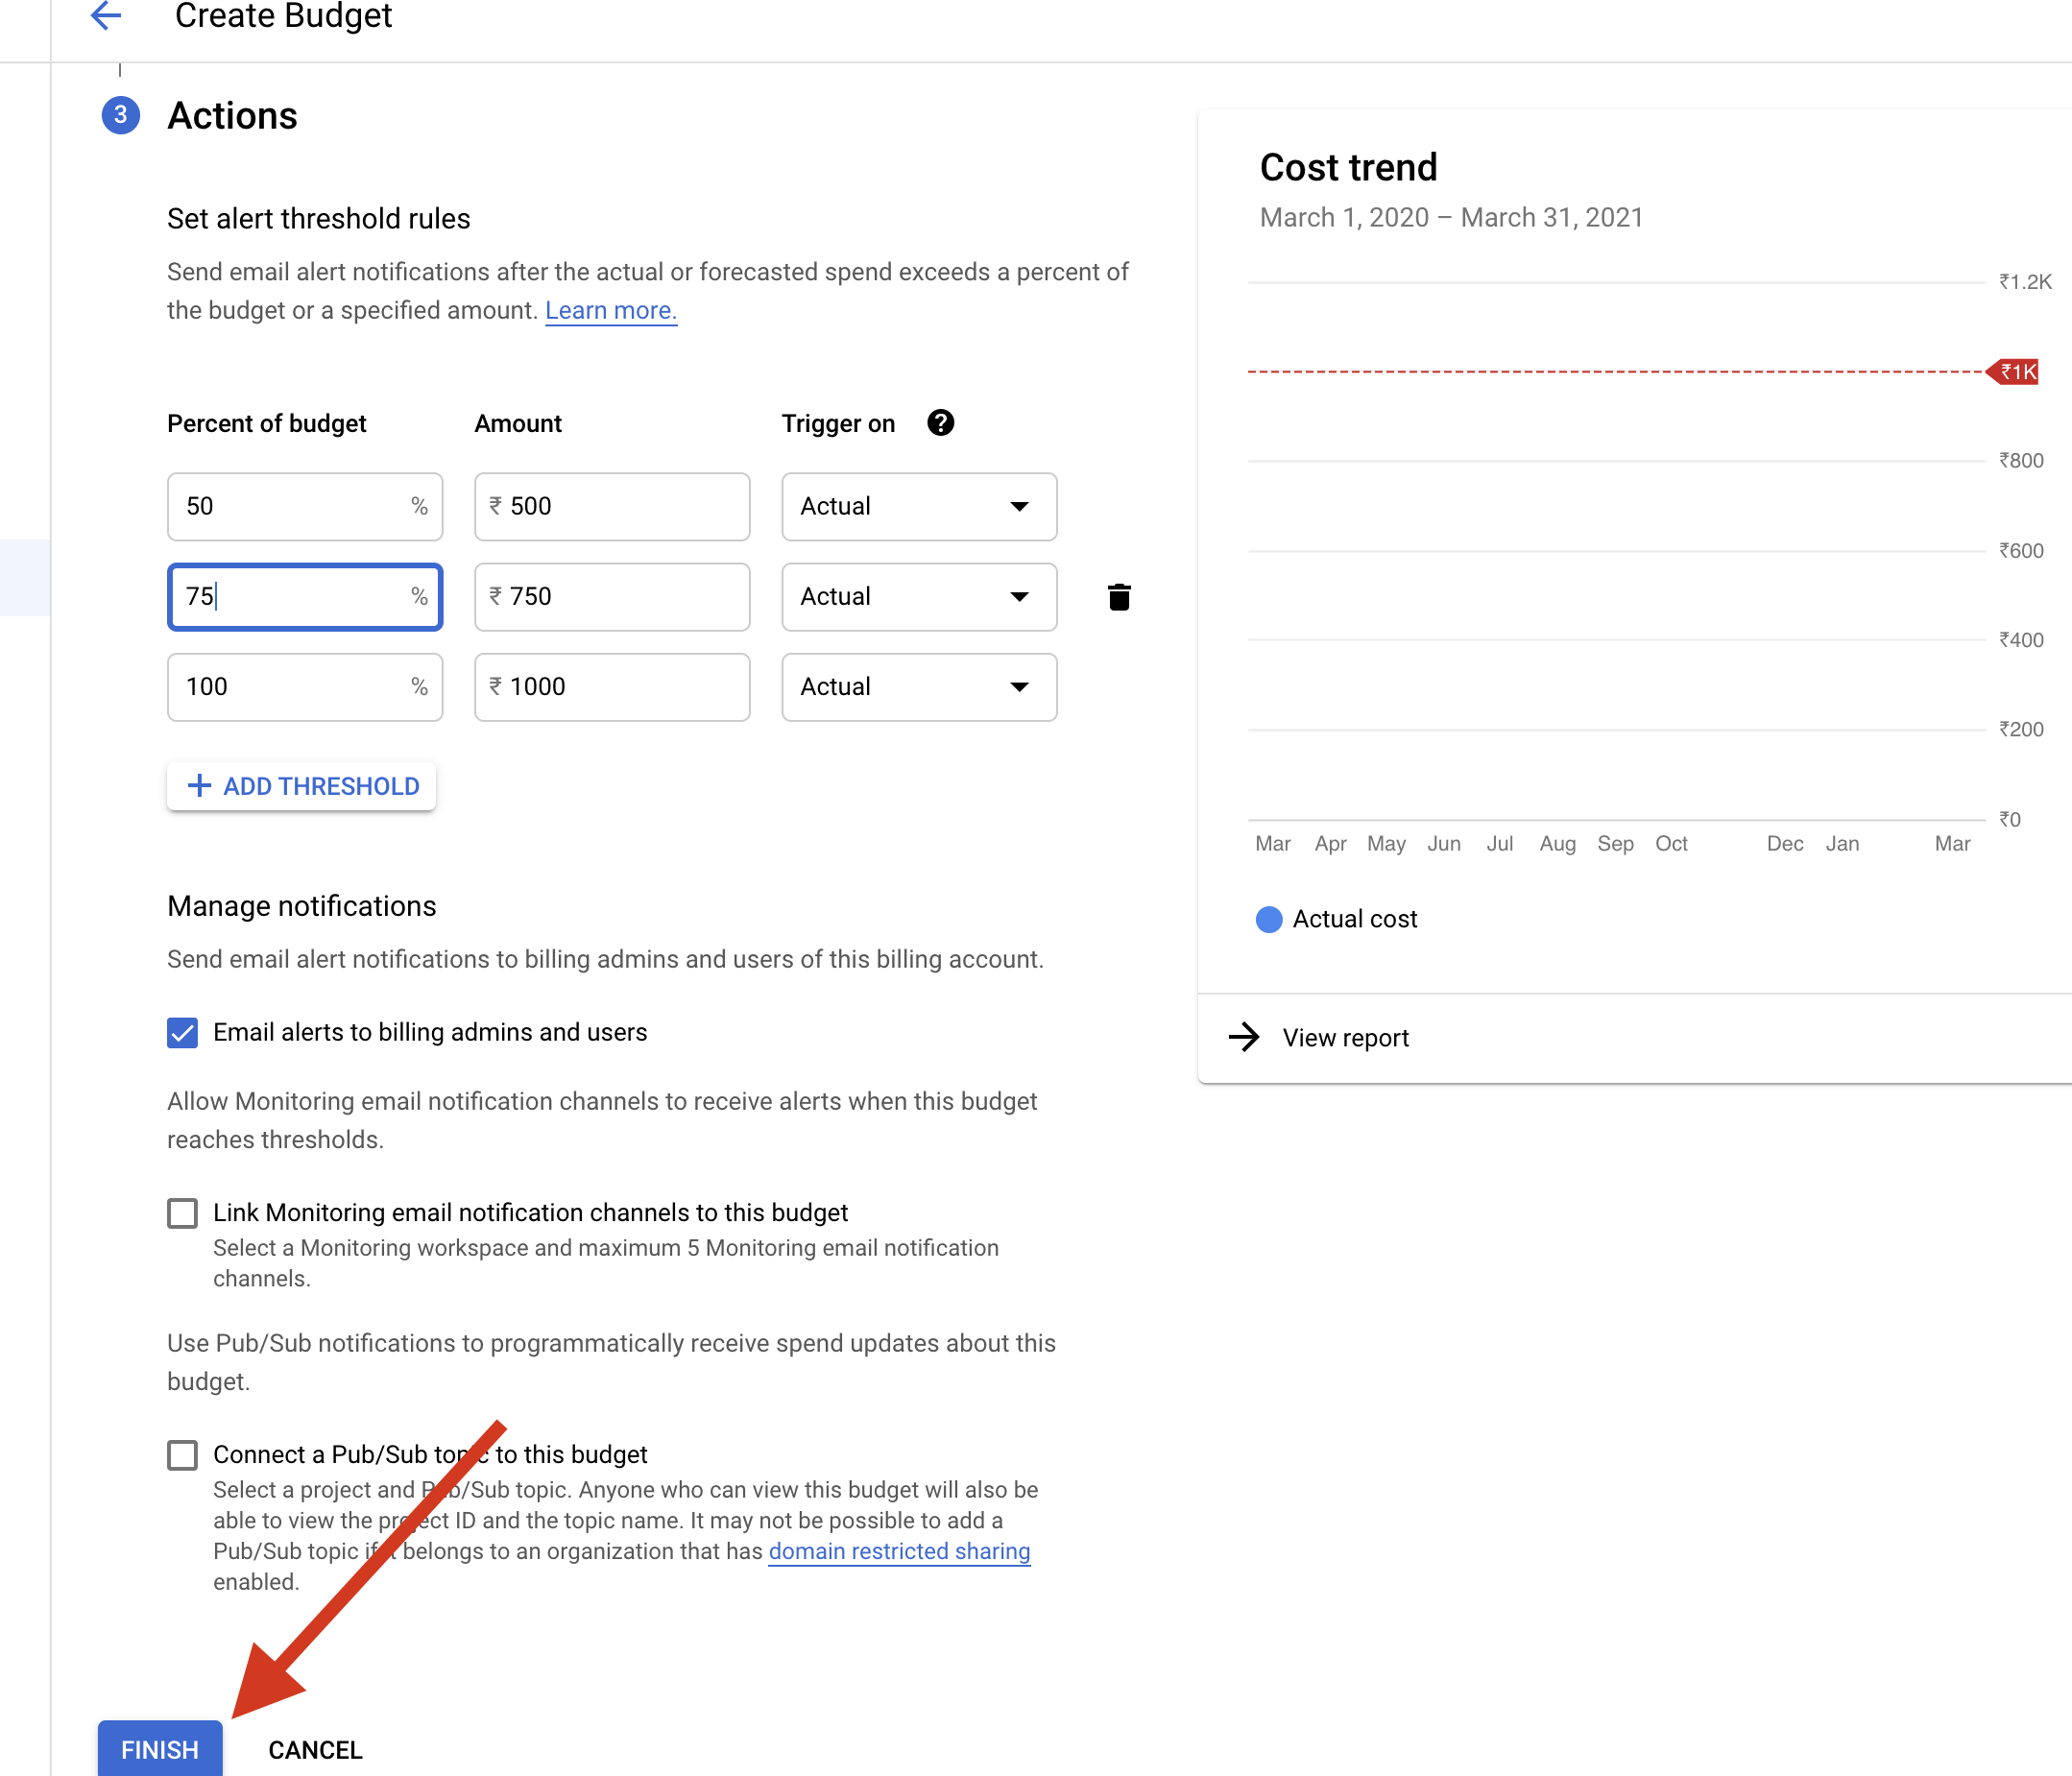
Click finish once you have done .On successful creation you will see the new billing alert that we have created
Conclusion Link to heading
title: “An Introduction to OS login in GCP” date: 2021-03-24 hero: /posts/gcp-3/banner.png description: Gcloud SDK menu: sidebar: name: GCP-3 identifier: gcp-2 weight: 10 Link to heading
Introduction Link to heading
Hello Friends 👋 ,hope everyone doing well .In this blog I am going to share how we can use OS-Login to secure the GCP Compute Instance access
Outcomes Link to heading
By the end of the article you will be able to get to know use OS-login feature in the Google Cloud SDK to make Secure
Pre-requisite Link to heading
- Computer with admin rights
- GCP account
Why OS login Link to heading
Imagine some developer in your organization want to get the SSH access to the Compute Engine for debugging or for some testing purpose.You can do the following
- Give Instance or Compute Engine admin access But the problem with this developer will also able to create delete stop instances this doesn’t follow the principle of the least privelage
- Add the SSH-Keys to the instance But there is no way to keep tracking and monitoring those keys in the large organization
In order to solve those problems GCP has introduced the OS-Login which allows the user only ssh into the instance
OS Login advantage Link to heading
-
OS Login access are based on the IAM So if you decide the developer no longer need to access those resource want they can simply remove the role associated with the IAM
-
OS login allow the user to give sudo permission or allow to login without the Sudo Permission
How to Enable os Login Link to heading
Enabling the OS login is the two step process
Create the IAM user Link to heading
Create the Iam user with the below two role
Go to the IAM Page in the GCP and Click ADD
Image -1
Enter the email-id of the user you want to give access
Image-2
Give the user below two permission
1. Service account User
2. Compute OS Login
If you want to give access to give sudo access give Compute OS admin access
Click save
Creating the Instance with the Metadata Link to heading
Now we have to add the metadata to the instance to enable the OS login We have two choices
- Adding the metadata project wide .This will enable the OS login in the all instance
- Adding the metadata at the instance level
For the sake of the article we are going to add metadata at instance level
Now go to the Compute Engine Console
If you are creating the instance using the GUI click the down arrow symbol this will extend the additional options
Image Enter the below value in the Metadata section
oslogin TRUE
Image
Click create
Now I am switching to the Developer account and try to ssh into the instance
You could see we are successfully able to ssh into the instance
Now I am trying to delete the instance
Image
You could see I am getting permission denied
We have succesfully achieved the Least privelage
Imagine you longer want give access to the developer you could simply remove the previously assigned role
Now I am trying to ssh into the instance after role removal
image
You could see permission denied eventhough I was able to login into the instance previously
This is how we can use OS-login to Secure Compute Engine access
Conclusion Link to heading
Thank you for reading my blog I hope you learned something ,If you have any comments or questions feel free to reach out to me on Twitter Feel free to check out my other articles at my-website